How to Install an Overhead Crane Step by Step
(Complete Installation Guide for Safe & Efficient Setup in 2026)
Installing an overhead crane is a critical process that directly impacts safety, performance, and lifespan. Whether you're setting up a single girder crane or a double girder overhead crane, following the correct steps ensures smooth operation and compliance with safety standards.
This step-by-step guide will walk you through the entire overhead crane installation process, optimized for both beginners and industrial buyers.
1. Pre-Installation Planning (Foundation for Success)
Before installation begins, proper planning is essential.
Key Tasks:
-
Confirm crane specifications (capacity, span, lifting height)
-
Inspect building structure (columns, beams, load-bearing capacity)
-
Prepare installation tools and equipment
-
Assign trained installation personnel
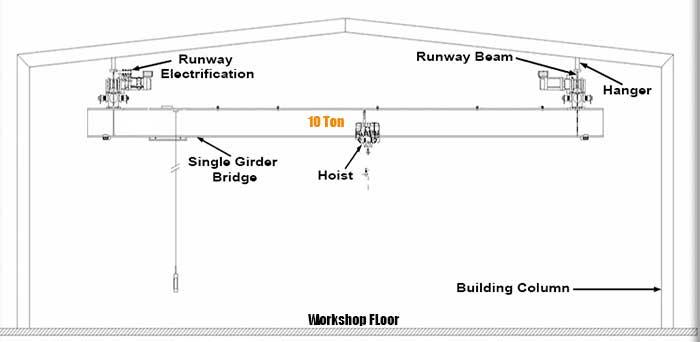
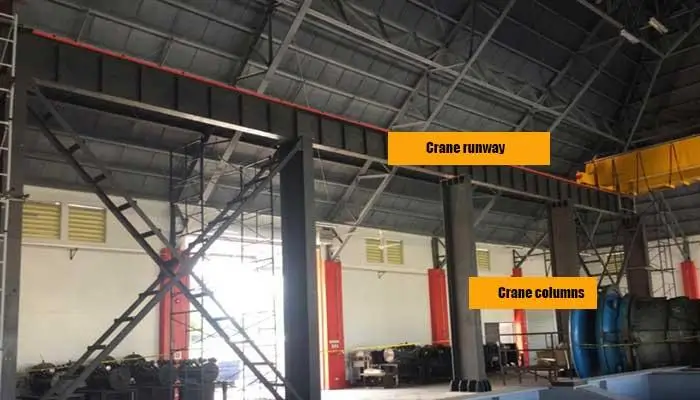
2. Install Runway Beams & Rails
Steps:
-
Install runway beams along both sides of the workshop
-
Mount crane rails on top of beams
-
Align rails precisely (critical step)
-
Secure with bolts or welding
Tolerance matters: Poor alignment leads to wheel wear and derailment risks.
3. Assemble the Crane Bridge
What to assemble:
-
Main girder(s)
-
End trucks (end carriages)
-
Walkways (for double girder cranes)
Tips:
-
Follow manufacturer instructions strictly
-
Check bolt torque and connections
4. Lift & Position the Crane
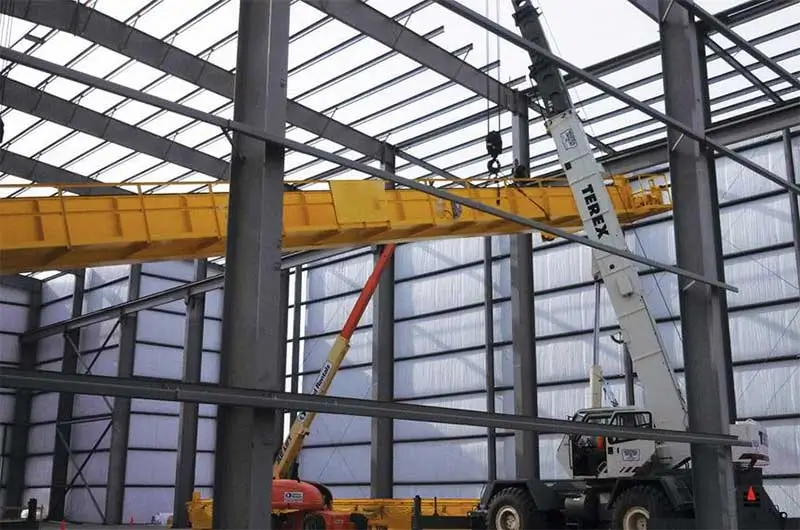
This is one of the most critical steps.
Process:
-
Use mobile crane or lifting equipment
-
Lift the assembled bridge
-
Carefully place it onto runway rails
-
Ensure proper seating of wheels
Safety First:
-
Use certified rigging equipment
-
Keep personnel clear of lifting zone
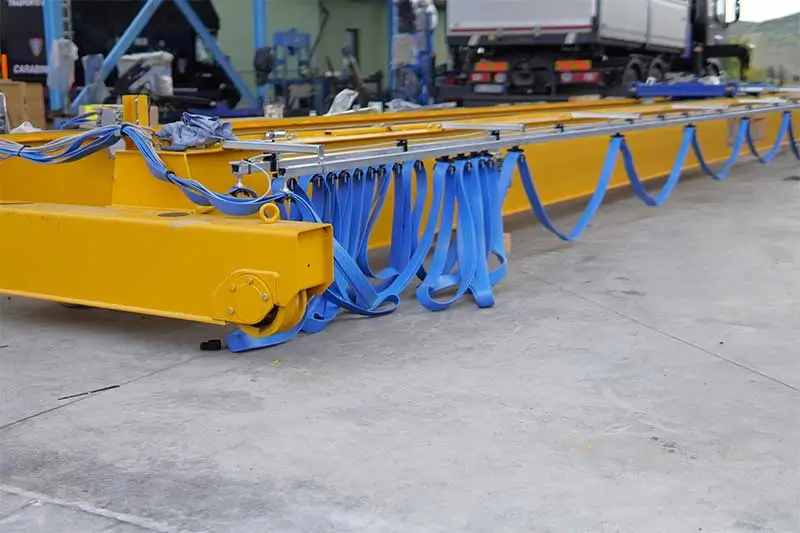
5. Install Hoist, Trolley & Electrical System
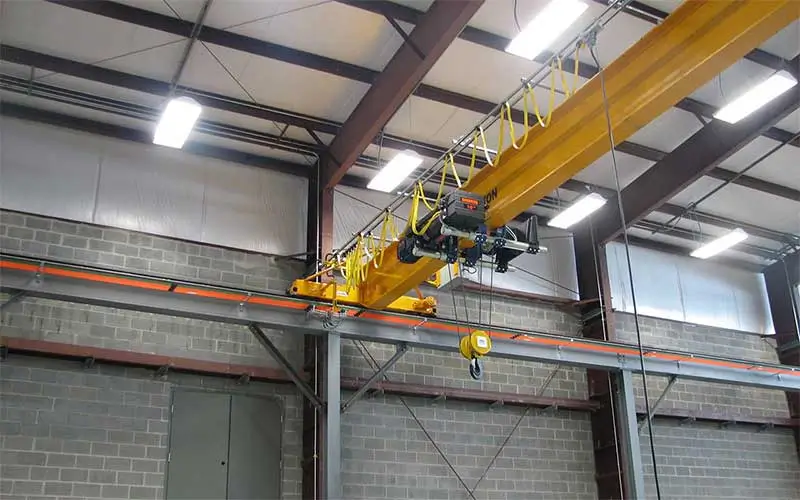
Mechanical Installation:
-
Mount hoist onto girder
-
Install trolley system
-
Check movement along beam
Electrical Installation:
-
Connect power supply
-
Install control panel
-
Set up pendant or remote control
-
Install festoon cable system
Ensure all wiring complies with local electrical standards.
6. Testing & Commissioning
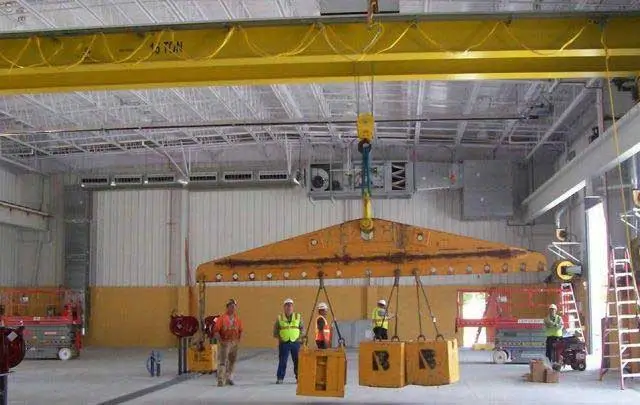
Testing Checklist:
No-load test:
-
Run hoist, trolley, and bridge
-
Check smooth movement
Load test:
-
Test with rated load
-
Verify lifting performance
Safety checks:
-
Limit switches
-
Emergency stop
-
Braking system
Only after passing all tests should the crane enter operation.
7. Final Inspection & Operator Training

Final Steps:
-
Conduct full inspection
-
Document installation results
-
Train operators on safe usage
Training is essential to prevent accidents.
Installation Timeline (Typical)
| Step | Time Required |
|---|---|
| Planning | 1–3 days |
| Runway installation | 2–5 days |
| Crane assembly | 1–2 days |
| Electrical setup | 1–2 days |
| Testing & commissioning | 1 day |
Recommended Crane Solutions
- 5 Ton Overhead Crane for Warehouse
- 10 Ton Overhead Crane for Factory
- 15 Ton Double Girder Overhead Crane
- Gantry Crane Price
Final Thoughts
Installing an overhead crane is a technical process that requires precision, planning, and safety awareness.
Follow this step-by-step guide to ensure:
-
Safe installation
-
Smooth operation
-
Long equipment lifespan